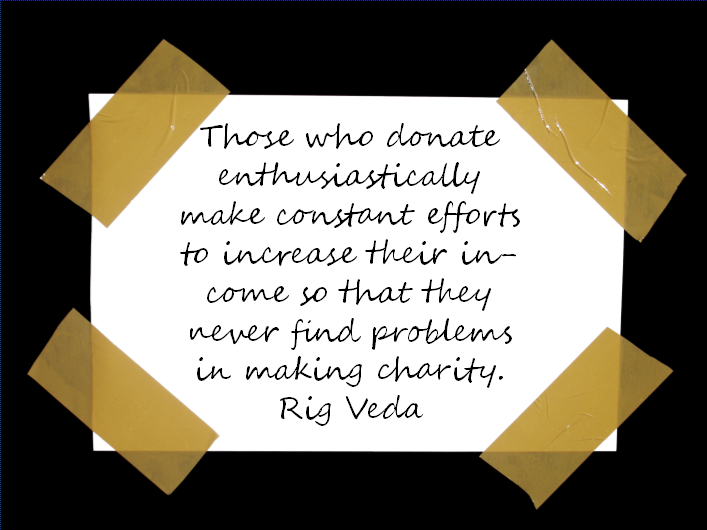
My favorite quote by my favorite author May 12, 2016
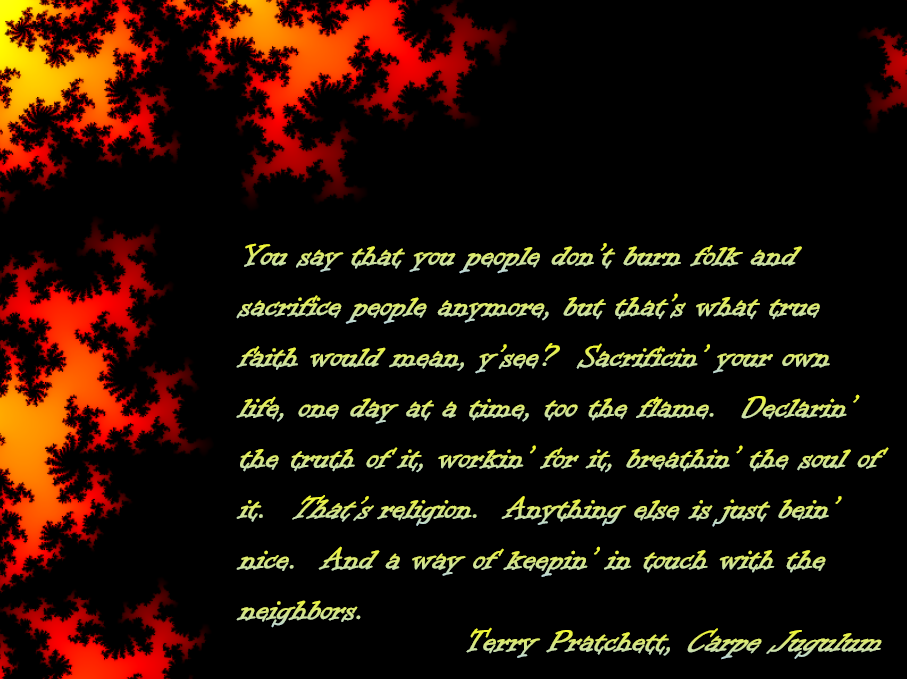
Comments Off on My favorite quote by my favorite author
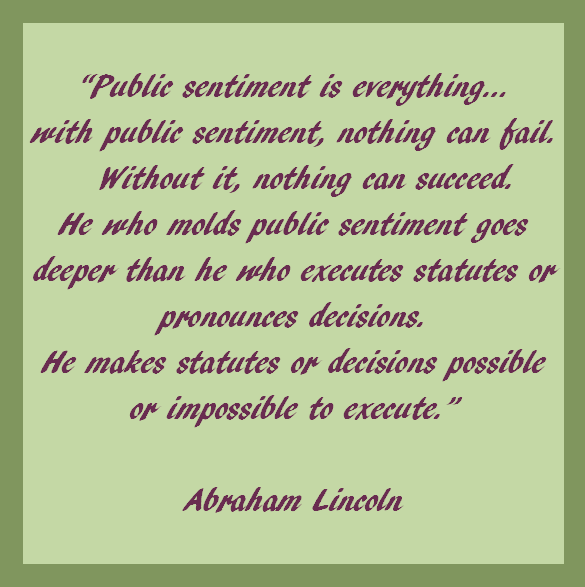
Meme Attempt September 10, 2015
I know I’m not the first to do this type of meme, but when I saw the following news story, I had to try my hand at it.

Comments Off on Meme Attempt
Gender Reveal Puzzle July 29, 2013
It’s a common thing now to have a gender reveal party when one is pregnant. Some reveal through the color of a cake. Others fill a box with balloons which they then open. My friend Lyle and his wife got a little more creative with their reveal. Lyle is the owner of a landscape architecture company and pretty handy with tools. So he and his wife created a puzzle for their friends and family to put together. They reserved the final revelation pieces to place themselves, but let everyone else in on the fun. I don’t have pictures of the actual creation, but here are pics of the assembly at the party. I’m sure that you can figure out how to make your own puzzle.

Comments Off on Gender Reveal Puzzle
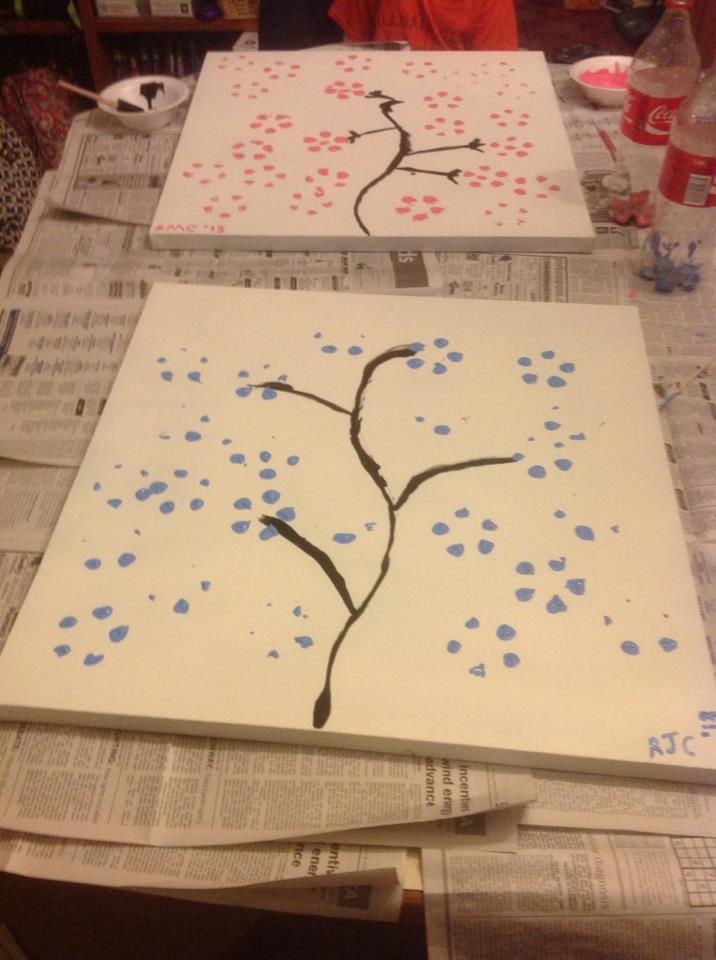
Coke Bottle Art March 9, 2013
I recently acquired two pre-painted canvases. The image on them was nice, but not my style. So I used some Kilz and painted over them. A little product endorsement here: Kilz is the best primer I’ve ever used. Doesn’t matter if it is in the spray can or the paint on variety. That stuff has the best coverage. Plus, for a project like this, I didn’t have to go over it with white paint when I was done. The Kilz looks fine on its own. I splurged this time and also got myself a spray paint handle. Worth the money. It kept my hands clean and it’s so easy my four year old was able to use it. You could get it from Amazon, but I got mine at my local Walmart and I’ve seen them at Ace Hardware as well. You can probably find them at Home Depot or Menards. So don’t spend money on the shipping until you’ve checked around your town first.
Anyway, back to the craft. The plan was to have my kids make some art for the walls. At first I thought I would hang them in my craft room that I’m repainting/organizing. But my husband liked them and so we are going to hang them in the living room instead.
And again I digress. Once the canvases were primed and dry the craft was super easy. We used three styrofoam bowls, acrylic paint in black, pink, and blue, two 1 liter Coca-Cola bottles, a sponge brush, and a pencil.
First thing was to use the pencil to trace lines for the tree trunk and branches. Then the kids took turns with the sponge brush and black paint (the paint was poured into the bowls) to paint along the lines. Then my son got the bowl of blue paint, my daughter the pink (they chose the colors), and each got a coke bottle. They would dip the bottom of the bottle into the paint, then stamp it onto the canvas. Easy peasy.
And here are the finished master pieces. So so easy and kid friendly to make.
Comments Off on Coke Bottle Art
How I made Lightning McQueen November 8, 2012
Honestly, this isn’t a tutorial. It’s more of a generic idea that I did. I did take a few photos as I was working on it, but not enough for you to follow the directions.
In addition to my daughter’s Rapunzel challenge, my son wanted to be Lightning McQueen for Halloween. Not a race car driver, but McQueen. Which meant that somehow a box car that could be worn by a four year old yet still looks like McQueen had to be fashioned. There were actually two made. The little one that my husband crafted, and the big one that I made.

Little McQueen
This one was made from technically 2 boxes and poster board. Body itself is one medium size box with three of the four top flaps cut off. On the bottom, two flaps were cut off and the other two were trimmed to make room for his legs then taped into place. To round out the front, a strip of poster board was cut and taped in place, then tapered along the top so the hood (also made of poster board) would be angled. Then a hole was cut into the front of the box and a smaller box was inserted to act as a candy catcher and keep the front end in place. The rear flap from this inner box was taped to the windshield to hold it up. Along the sides are poster board windows and in the back is a cardboard tail fin. We learned when painting over plastic packing tape, you want to make sure you get a good base coat of primer on all the surfaces or else the paint will not adhere. The eyes were colored on with crayon and the mouth and headlights were printed on computer paper then stuck on with school glue. On the sides a big yellow lightning bolt was painted with a computer paper 95 glued over it. The wheels are just cardboard rounds that were painted red and black then adhered with shoe glue. To make the car wearable, red gross-grain ribbon was threaded through the bottom of the car and the box forming the engine compartment. This car is small enough the little boy was able to reach over the windshield and lift the hood to receive his candy.
This costume was used for trick or treating in confined spaces, i.e. the residence halls of the college across the street.
Now here’s the Big McQueen.

Big McQueen
He is actually constructed from three large boxes I got from the pharmacy where I work and one small box. The wheels are made from eight paper plates that have been painted and glued together, then attached with shoe glue. If I had been on top of things I would have attached them with brads so they would spin. The Rust-eze logos (on the hood and tail fin), eyes, 95 decals and the license plate (on the back) are all printed on computer paper and glued on with school glue. The lightning bolts on the sides were painted. You can’t see it, but there is a “lucky sticker” on the far side of the hood that was made from glitter glue.
For the construction, I started with one box in the middle. The bottom flaps were all removed to make room for the little boy. The top flaps were all left as part of the vehicle. The front and back flaps were left intact but angled to form the front and rear windshields. The side flaps were trimmed and then taped to the front back flaps to form the side windows and then also to hold the windshields at the correct angles. The center of these flaps was cut out to form the windows for the little boy to put his hands out and to also remove some of the weight. The front and back ends are actually from one box that was cut at about a 70/30 ratio. The larger portion was taped to the front and the smaller to the back with the open ends facing the center box. The front portion was then tapered at a steep angle to continue the windshield for a couple inches, then at a shallow angle to form the engine compartment. Poster board was used to round out the front end. A third box as well as the remnants of the first two boxes were used to form the hood, bottom edge of the windshield and the tail fin. Slits were made near the top of the front and rear windshield for the ribbon to go through to make the car wearable. A smaller box was cut in half then glued to the bottom of the body between the wheels to give it some support when not worn. Because this car is so much bigger, some “invisible” thread was run from a scrap of ribbon inside the car, through the windshield and down to the front edge of the hood, then back, to act as a pulley. One run of the thread was not strong enough, so I ended up running it three times before tying it off.

Open hood

Tail Fin Logo
Comments Off on How I made Lightning McQueen
DIY Halloween October 31, 2012
Yes I am that mom. I do the fancy birthday cakes for my kids, not to show up every other mom out there, but because I’m too cheap to buy one from the store.
I also make my kids Halloween costumes. Yes, I do use patterns when necessary, but sometimes the kids have requests that don’t have easy to follow patterns, and then I get really creative. These are the challenges I like.
This year presented two challenges.
Challenge #1: Rapunzel’s braid
So the pattern I used for the dress also came with instructions for the hair. But those instructions were written for a kid with a normal sized head. My daughter, well, at 9 months she measured 50% by length, 60% by mass, and 98% by head size. At 7 years old she is more proportionate than she was as an infant, but her head is still larger than average, which meant the pattern’s instructions were not going to work. So I read them over, got the gist of what they were going for, and threw them out the proverbial window. Then I did my own thing and here is the result.

Rapunzel’s braid
I used a skein of Lion Brand Yarn Pound of Love in the Honey Bee colorway. I then cut 90 strands of yarn that were about 3 yards each. I measured by holding one end of the yarn in my hand and stretching to my far shoulder, then repeating 2 more times. After all the yarn is cut, hold all the strands together and loosely tie a knot at one end. Then carefully remove all the tangles and loosely knot the other end. Cut two lengths of yarn about 5 or 6 inches long: these are used to make the bun loop at the top of the braid. Double up the long strands and tie one of the shorter lengths in the middle, then tie the other to make the loop.

Bun loop
Next take a 9 foot spool of ribbon and unroll it. Thread one end through the yarn tied at the base of the bun loop. Pull the ribbon through until the ends are even. Carefully untie the knots at the ends of the yarn. Count out the strands so that you have 3 groups of 60 strands of yarn. Include the ribbon in two of the groups. Braid the yarn until there are only about 5 inches left. Cut one final length of yarn, again 5 – 6 inches long, to wrap around the end of the braid and tie it off.

End of the braid is tied off with more yarn
Trim the ends of the yarn so that they are all even. Through out the braid, weave in silk flowers. To attach the braid, I pulled my daughter’s hair into a high ponytail and secured it with an elastic band. Then I loosely twisted her hair into a bun and secured it with 4 or 5 hairpins. Then I slipped the bun loop (there’s a reason I called it that) over her bun and secured it with another 4 or 5 hairpins. And voila, one Rapunzel ready for trick or treating.

Bun loop around the bun and pinned in place
Next post: How I made Lightning McQueen.
Comments Off on DIY Halloween
Grandma’s Butter Cookies October 22, 2012
Warning: massive amounts of cookie dough ahead. Do not proceed unless you have your sweet tooth ready.

I put the egg carton next to it for size reference. The dough sits as high as the top of the egg carton and is nearly as long in diameter.
Seriously, this recipe makes an incredibly large amount of cookie dough. The card I inherited from my grandmother said that it makes about 170 cookies, but does not mention what size these cookies are. I do know that it is big enough that when I make the dough, I usually divide it up into about 7 lumps, and freeze it until I actually need to bake cookies for something. The cookies by themselves are quite yummy and are great for frosting, but the best use I have found is for my Turtle Shells. I haven’t tried it, but I suspect that this cookie dough would also make for a pretty good fortune cookie.
But on to the recipe:
10 eggs
1 lb butter, softened
4 cups sugar
1 teaspoon baking soda
2 teaspoons cinnamon
2 teaspoons cream of tartar
enough flour to make a dough (about 9 – 10 cups)
In a large bowl, beat together the eggs and butter. Add in the sugar and mix well. Sift in the baking soda, cinnamon, and cream of tartar. Then add the flour one cup at a time. After about 6 or 7 cups, you may need to give the mixer a rest and turn the dough out onto a very well floured surface to knead in the remaining flour.
Once you are satisfied with the texture of your dough, divide into 6 or 7 equal parts and coat with flour. Then wrap with plastic wrap or wax paper, place in zipper freezer bags and freeze until ready to use.
When you are ready to bake, allow the dough to thaw to room temperature before you begin working with it. Preheat oven to 350 degrees. Roll out dough and cut with cookie cutters or form a log about 1 – 2 inches in diameter, then cut into 1/4 inch slices. Bake on a greased cookie sheet for 12 – 15 minutes or until golden (and smell delicious).
Comments Off on Grandma’s Butter Cookies
My First Pattern August 17, 2012
Just last night I finished a baby blanket for my niece, June, and for the first time ever, I created the pattern that I used. I’ve made a lot of baby blankets over the years. Some quilted, some flannel, some knit and some crochet (at least 18 that I can remember, probably more). Until now, not a single one was completely my own creation. Oh, yes, I’ve made subtle changes to patterns over the years so that something I saw would work better for what I was doing. But it was still someone else’s pattern. But not this time.
It took many hours in Excel to chart it out to know what I was doing. And I still haven’t gotten the directions written to my satisfaction (darn seed stitch). Here is the final result.

I knitted it on the diagonal using a combination of knit, purl, and seed stitches. Eventually I hope to have some easy to follow instructions written up for someone else to try making it.
Comments Off on My First Pattern
